
You know what they say about historical costuming? "Foundations, Foundations, Foundations!"
er... or something like that.
But in all seriousness, when I began my research into historical dress the piece of advice I found over and over and over again was to have the correct undergarment, no exceptions. In the 18th century, this means: a shift, stays, false rump, pockets, and petticoat(s) - the more the merrier for the later.
Shift
I started with the simplest and most important garment first, the shift. This is later called a chemise and it the closest garment worn to the body under everything else. I learned a whole lot about this garment from Sharon Burnstons incredible website and from the gold standard in historical costuming "Before the Automobile".For my own shift, I decided to go with something very simple, which could be used under multiple gowns. I used the American Dutchess simplicity pattern but omitted the ruffles. I figured I could add flounces and tuckers if needed. I liked the drawstring, square neckline and narrower sleeves in this pattern, and ultimately it was easier than drafting a pattern myself. It is not the most historically accurate, but it does the trick.
I made it from a light cotton voile I had in my stash, with a narrow silk ribbon for the drawstring. Where I could, I finished everything by hand and flat felled every seam. I am very pleased with the finished product and have to resist wearing this as a nightgown.
 |
| My completed shift |
Shift resources:
- Everything you need to know about shifts from Sharon Ann Burton
- Good pattern and how to by the German Marquise
- For a great step by step from Before the Automobile
- A list of extant examples
- American Dutchess Pattern
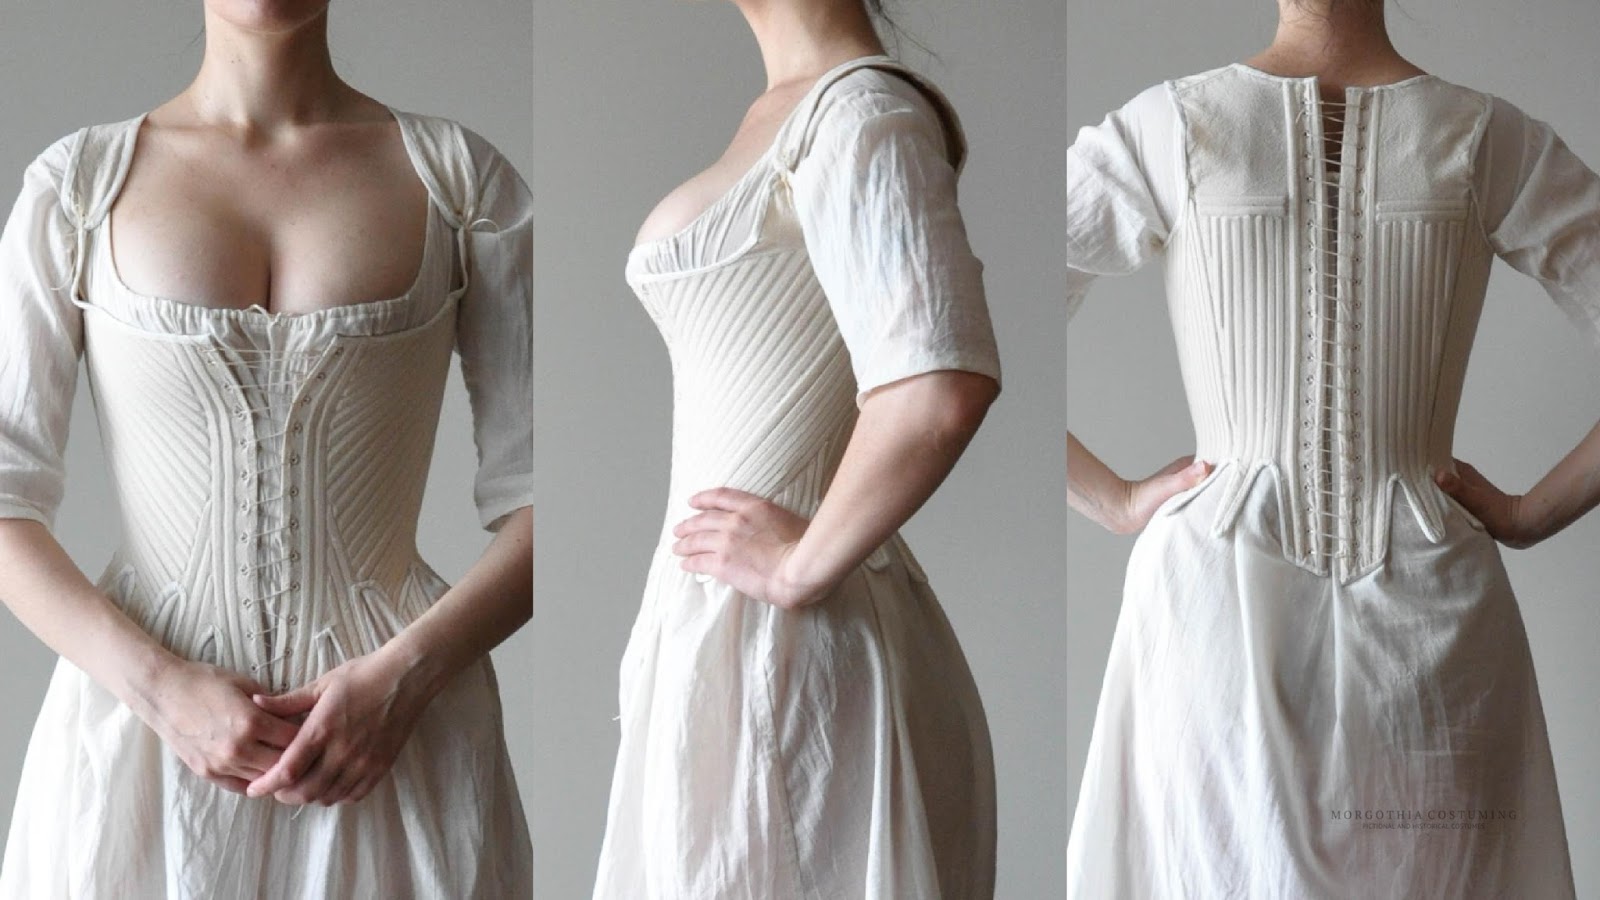
Stays
Making the stays was both easier and harder than I expected. Easier insofar as the channels and eyelets went by easily, harder in that getting the fit where I wanted was tricky. Many of the patterns I looked at were very short in the waist and didn't give me enough support or coverage.
I ended up using and modifying Butternick B4254, in part because I had it in my stash, and because it had the option to open at the front and back. Because I knew I would be getting into these myself, I didn't want to have to worry about how I was going to lace them up. Happily, both front and back lacing stays are historically accurate. I did end up lengthening the waist and redrawing the boning channels, but otherwise, the pattern seemed pretty good. In the future, I would move the armhole a bit closer to the front, as you can see there is a bit of gapping near my armpit.
I made my stays out of 2 layers of heavyweight cotton canvas (which I used because it was in my stash) and it is plenty strong. For boning, I used cable ties, a great trick I learned from American Dutchess. It nicely micks the look of reed or whalebone.
I think I will definitely make another pair of stays in the future. As much as I like this first pair, I want ones which are lower in the back and offer a bit more compression in the front to get that nice conical shape. these stays are much better suited to the later decades of the 18th century than I had intended.
Stays Resources
- Informative video from American Dutchess
- Gorgeous example from Before the Automobile
- Extant examples
- The Cut of Women's Clothes by Norah Waugh
- Corsets and Crinolines by Norah Waugh
This was more a small fun project than a necessity. I love embroidering so this was just a chance to do something new. I started off by using the pattern from American Dutchess' Blog, and then just went to town with the floss I had on hand.
I definitely want to make a bigger pocket, and I think I will base it off of this gorgeous example from the V&A


Post a Comment